Hardening Plants

It’s the time of year when many of us begin to think about moving plants outside that are now growing indoors under a light. It’s a common mistake for beginning gardeners to move their plants outside without first hardening them, but it’s a mistake you only make once! Moving plants outside without hardening them will usually kill them, wasting all the effort that went into growing them in the first place.

There are different hardening techniques, but they are all based on the same principle, slowly introducing your plants to the outdoors after being in your heated home under a grow light. Some people use a cold frame or greenhouse for this. It always takes about the same amount of time, roughly a week.

Whatever method you decide on in the end, here is a good place to start. Begin by setting your plants outside for 15 minutes the first day, then doubling the time each day (30 minutes, 1 hour, 2 hours, 4 hours, 8 hours, 16 hours). This is a very uncertain time for your plants, so watch them closely. If they start to wilt or look like they may be dying, stop the hardening process and return them indoors for a few days before trying again. At the beginning of the hardening process place the plants outdoors in the shade, and gradually introduce them to full sun over the course of the week.

Fava Beans and Other Cover Crops

Crop rotation is a very important aspect of a healthy garden. If you plant the same types of plants in the same space year after year, you will deplete the soil and provide a breeding ground for plant diseases and pests. Different types of plants have different rotational needs, for example members of the garlic and onion family should only be planted in the same ground once in 4-5 years, while cole plants about once in 3 years. It is wise to make a rotation scheme for your garden depending on what is necessary for the plants you grow. Crop rotations do not necessarily happen on an annual basis, for example you may follow garlic which is harvested in June or July, with a plant like turnips that can be planted in August and harvested a few months later.

In between other crop rotations, many people plant cover crops. A cover crop is one that is not necessarily intended to be grown for food, but rather the primary purpose of it is to improve the ground and keep it covered. Ground that is unused for too long will erode and accumulate weeds, and planting a cover crop can avoid this. One particularly useful type of cover crop is the family of leguminous nitrogen fixing plants. As well as loosening and improving the workability of the soil, these plants will take nitrogen from the air and fix it into the ground, leaving the ground richer in nutrients than before the plant was grown. Often cover crops are turned into the ground by digging or with a garden tiller after they are grown, leaving the ground richer in organic material.

Some example of common cover crops include winter rye, different types of clover, field peas, beans, yellow mustard, buckwheat, phacealia (a type of flower), as well as many other plants.

One of my favorite cover crops is fava beans. Fava beans have one of the highest rates of nitrogen fixing of any cover crop. They also also produce one of the highest rates of compostable organic material per square meter. They will loosen even highly compacted heavy clay soil. They are also very tasty to eat, both as a fresh shelled bean and as a dry soup bean. They are an excellent substitute for garbanzo beans when making hummus.

Quite a few fava bean seeds are needed to plant a relatively small area. To plant an area of 50m2 (500ft2), you will need between 0.5-3Kg (1-7 lbs), depending on how densely you plant the seeds. Since a typical packet only contains 30-60 seeds, you will need quite a few packets of seeds to plant an area like this. Most people, including farmers that grow them, normally get around this problem by saving their own seeds. It is normally too expensive to purchase seeds for growing every year. Seeds are saved from the plants after the plants mature and the pods turn black. Fava beans can cross pollinate, so when saving seeds only grow one variety at a time or space different varieties far apart.

Fava bean seeds don’t keep well. Purchased seeds are normally treated, which significantly improves their germination rates. If you save your own fava bean seeds you will need to count on low germination rates, and increase planting density accordingly. Planting densities given here assume germination rates typical of commercial seeds, and you will need to increase these densities according to your own experiences with the seeds you save and grow yourself. When storing fava beans it is important to keep them in an open container. If you have problems with rodents eating the seeds in storage, try glass jars with holes poked in metal lids, or try constructing your own containers made of wire screens. Fava bean seeds also freeze well, and can be stored in a freezer after they have been completely dried. Seeds that become moldy or develop large black spots in storage should be discarded.

As a food crop, fava beans are not one of the most productive. A relatively large area needs to be planted for a modest harvest. In addition, preparing fresh fava beans can be a lot of work as most people will remove the skins of the seeds before eating. In general, it’s more useful to think of fava beans primarily as a cover crop, with the added benefit of being able to provide a little food as well. In terms of food harvest, the smaller seeded varieties are better than the large seeded varieties.

Fava beans can be grown in a few different ways. They can be planted densely, then turned into the ground when they are young. In this case they are usually planted in double rows (two parallel rows 2.5 cm (1 inch) apart). These double rows are spaced 30cm (1 foot apart), and the seeds within the rows are spaced 15cm (6 inches) apart. They should be turned under before they get too woody, and while they can still decompose easily.

When growing fava beans for seed or food, they should be planted in single rows 30cm (1 foot) apart, and seed spacing should be 15cm (6 inches). In this case the plants will be too woody to simply turn into the ground, and will have to be collected for composting.

Fava beans are cool weather crops, and should be planted as early in the spring as possible. They can go into the ground as soon as it has thawed enough to dig. In some places fava beans can be planted in the fall and overwinter. Different varieties will survive different temperature extremes, but typically will survive to -10C (about 15F). Fava beans do not compete well with weeds, and one very good way to address the problem of weeds is to grow them together with another leguminous nitrogen fixing cover crop to smother the weeds. White clover is an excellent choice here, but other cover crops will probably also work well.

All leguminous nitrogen fixing crops depend on a naturally occurring bacteria in the soil for fixing nitrogen. Once any sort of bean or pea is grown, the bacteria stays in the ground for a very long time, and it is not an issue. If it has been a very long time since a nitrogen fixing plant has been grown in a particular spot, the bacteria will eventually establish itself there after planting something like fava beans, but it will take a long time. In the meantime the fava beans will grow very slowly and will be weak. Commercial inoculants can be purchased to treat the seeds at the time of planting. These can be a considerable help in establishing this bacteria.

Weed Burner

Weed Burner

For an update on this article see: Weed Burner, Part 2

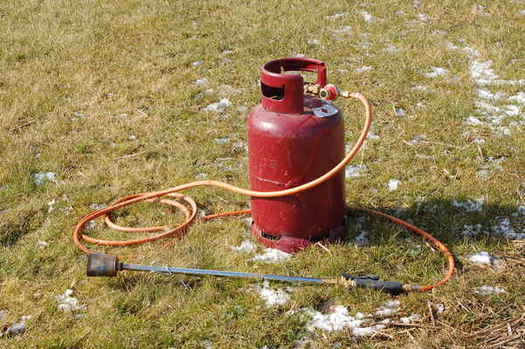
Until chemicals began being used around the 1950s, weed burners were an important means of controlling weeds in agriculture, but today have almost been forgotten. Above is a picture of the weed burner I use.

Even though weed burners have not been widely used for a while now, the underlying technology of gas burners has improved dramatically in that time. Modern gas burners are much hotter and more efficient.

The weed burner shown above is one of the smallest models that will connect to a propane bottle, and the flame is shaped in a point. They can also be purchased in even smaller models that use a canister of gas similar to what a camping stove uses. Flames can be shaped in a point for use close to crops or wide intended to be used to cover large areas quickly. Sizes range up to tractor size that burn several kilos of propane per hour.

In Europe, some organic farms have been using weed burners where the flame heats a ceramic plate, which in turn burns the weeds. This is the so called infra red weed burner. The advantage of this is you don’t have an exposed flame, and the risk of starting a fire is less.

Okay, moving from farms back to gardening. There are circumstances in which it can’t be used. It is an exposed flame, and you can’t use it in a dry climate or around flammable materials. This makes it hard to use at the same time you use mulch, because most mulch is flammable. It also does not work against established weeds, as the only thing it does is burn the leaves off which just grow back again.

What is it good for? It works very well against weeds up to and including the cotyledon stage. For example if in the spring, your garden gets dusted by seed from dandelions or other weeds and they start sprouting, they can all be quickly destroyed with a weed burner. It will also destroy unsprouted seeds. If you have some compost that has been contaminated with weed seed, it can be spread out to a thickness of about 1 cm, and burned with the weed burner. Or you can just pass the flame over the top your compost pile to kill any seeds that may be there.

It is very easy to cover a large area quickly. My weed burner will cover about 100m2 (1000 ft2) in about a half hour, but there are circumstances when it takes longer like the ground is frozen or cold or there is a special problem that is being addressed with it.

The weed burner can be helpful right after plowing or rototilling the ground, because sometimes seeds are exposed and burning the pieces of exposed roots can help weeds from re-establishing themselves in the ground.

If you have a patch of established weeds, that you don’t have time to take care of before they go to seed, the weed burner can be used to slow their growth for a few days by burning the tops of them off. Of course this can also make them more difficult to dig them up when you finally get around to it.

In the last few weeks I have been using the flame to burn some things in the garden that would otherwise be more difficult to remove, like patches of dried out grassy weeds.

My garden is very large, about 1000m2 (10,000 ft2), and I plan to expand it in the coming years. The ground is also hard clay. Both of these things make it difficult to remove weeds under any circumstances, and in general I have a major problem with weeds. I can imagine if these things were not true, a weed burner would be less useful.

Having said all of this, I am really happy with it. It has become one of my favorite gardening tools. There is a reason why chemical weed killers became more popular, they do work much better, and this tool is certainly not going to solve all of your weed problems. It is however a great tool to use together with other organic methods for controlling weeds.

Grow light made simple and cheap

It’s the time of year when many of us start plants indoors. One of the most difficult and expensive things is to figure out what to do about lighting. It’s unusual this time of year to have a source of natural light adequate to start plants indoors, so the choice is what kind of artificial light to use.

The two most common choices of artificial light are fluorescent bulbs or a grow light. Many people avoid grow lights, because they think they are too expensive or too complicated, but this doesn’t need to be the case.

Grow lights are based on 5 main components, together with the interconnecting wires:

Reflector hood and bulb base: There are many different shapes and sizes. Choose one that fits the shape of the area you will grow the plants. Avoid ones that have pronounced ridges or may in some other way create unusual shadows or bright spots when reflecting the light. Make sure you get a bulb base that matches the bulb you plan to use, the one shown here is very standard.

Light Bulb: There are a few different kinds of bulbs, and I would recommend a sodium vapor type. This is probably the most common type, and other types are mostly used when growing plants to the point where they bloom and would then need a slightly different spectrum. If you have come across some second hand equipment that uses a different type of bulb, don’t be afraid to use it, it should work fine. When choosing a bulb, pay attention to the number of rated lumens with respect to the wattage of the bulb. The more lumens the better, and you can save yourself a lot of electricity by choosing a lower wattage bulb. I use a 400w bulb. Remember that a larger bulb will also generate more heat.

Ballast: The ballast has some circuitry that does several things. It provides the correct voltage to operate the light, it provides some initial voltage spikes to start the bulb when it is first turned on and it provides some filtering to prevent interference with the power grid. The ballast needs to match the wattage and type of bulb you are using. If you use a 400w sodium vapor bulb you won’t have any problem finding a matching ballast.

Relay: The relay is necessary because the grow light uses a surge of electricity when it is first turned on, and this together with the minimum 400w of operating power are too much to safely use a standard electrical timer. The timer operates the relay, which only uses a few watts, and the relay in turn operates the light. In this way the grow light draws its power through the relay instead of the timer.

Timer: Just a standard household timer.

As far as cost goes, here in Amsterdam these things cost roughly the following (in US dollars):

  • Reflector hood $7
  • Light Bulb $20
  • Ballast $50
  • Relay $7
  • Timer $5
  • Loose wire $0.50/meter

For an average person, with an average number of plants, this is more than enough. If you buy a pre-assembled grow light, you will probably pay 2-3 times as much for the same thing. If you make it yourself in this way you have the advantage when something breaks it is easy to fix, and if you have more than one light you may be able to swap parts. All of the parts shown here are very common, and made by many different manufacturers, and generally are easily mixed and matched. When compared to the price of fluorescent bulbs and fixtures, this competes very well.

The only tricky part about wiring it is the relay. It’s hard to go into much detail here, and it depends on the type of relay you buy, but generally they come with instructions. Otherwise, the ballast has a side that connects to the electricity and a side that connects to the light, and is no more difficult that wiring a normal light.

When you are done, you will have some exposed wires. These can be a hazard to children or pets, and you need to think about how to cover them. I use a small plastic trash can to set everything in, but depending on your circumstances you may want to construct a more secure housing.

This is what my light looks like when hung up from the ceiling:

Setup light

The distance between the light and the plants should be at a minimum, but should be enough so the plants don’t get warm. As a rule, you can never have too much light but you can have too much heat. When your plants start to grow, simply raise the light so it covers more area (you might want to take into account that you are going to raise and lower it when you think about how to attach it to the ceiling). There will come a point that plants on the edges don’t get enough light. At first you can probably deal with this by rotating the plants, but eventually you will need to buy a second or higher wattage light. My light is enough for an area of about 2×3 meters (2×3 yards).

Take care to use a room with good ventilation. Not only can the grow light generate a lot of heat, but as your plants get bigger they will need fresh air too.

The winter garden

Since the garden is on the sea, it’s windy. Since it’s winter, it’s cold. All that makes for a very quick, businesslike visit to the garden.

The last week of December we went up just after a storm, to make sure most of the plastic ground cloth (which I shall forevermore refer to as ‘plastic’) was still down on the ground. It was, along with a nice dusting of snow.

Dijk covered in snow

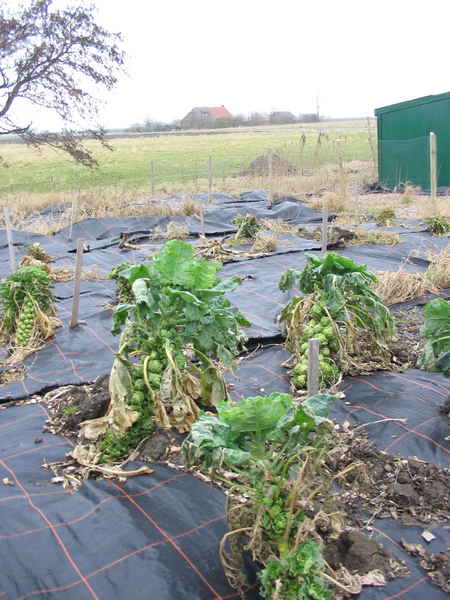
We went up yesterday, and the weather was a little more amenable. I harvested brussel sprouts and Patrick dug up some parsnips. Here are some sprouts before they got picked.
Brussel sprouts

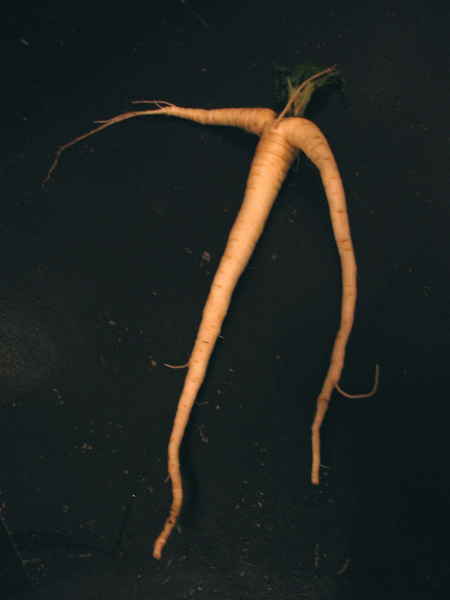
And here is an excellent specimen of bifurcation.

bifurcated parsnip

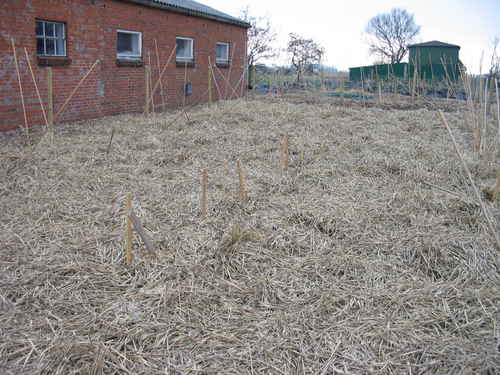
The garlic is keeping warm under this layer of straw.

Garlic under the straw