Here’s a video Luigi mentioned, that goes together well with my last post about Tom Wagner’s potato breeding trials.
Popcorn Homestead
Joan of Popcorn Homestead just sent me an email to tell me about her blog. Located in Tokyo, Japan, she’s a fellow yacon grower! I’ll bet she’ll be a good person to trade plants with in the years to come.
The only other garden blog in Japan I know of is Adekun’s Japan Blog, so it’ll be nice to hear more from that part of the world.
Beds, Ground Cloth and Water Butts
I posted the other day about how I prepare my garden beds, and I’ve since had a chance to take some pictures. I want to emphasize I’m not necessarily saying this is the best way for everyone, but it’s the system I’ve come up with after gardening in the Netherlands for about 10 years now. As much as possible it makes use of locally available, reusable and recycled materials, and it takes into account local conditions. It should give you something to think about when you plan your own garden.
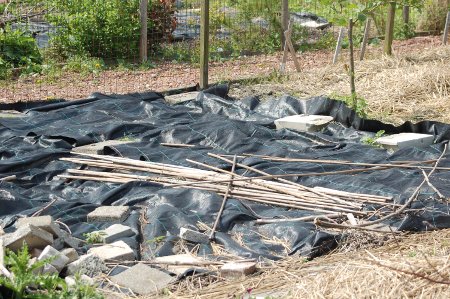
When a part of my garden becomes disused, especially at the end of the year, I cover it with plastic sheet mulch or what’s called here ground cloth. I think in the US it’s called landscape fabric. I cut it into 2 x 2 meter squares, which is a convenient size to handle, but also lets me cover large areas quickly. These need to be weighted down, and also constitute unused space, so tend to collect junk. Here you see some unused bamboo poles and extra pieces of concrete.
The paving slabs I use to weight down the corners are what the city of Amsterdam uses to make sidewalks. Every few years these get replaced, and the city disposes of the old stones. If you’re in the right place at the right time, you can just fill up your car with them.
Some people might turn up their nose a bit at the idea of using plastic in their garden, and it certainly works well to use biodegradable material like cardboard or newspaper, then leave it in place and plant over it. For me I use a lot of sheet mulch and I have to carry everything first in my car, then a long distance by foot. I really need to use something reusable instead of biodegradable.
I’ve bought my ground cloth at different times, but some of what I have is 8 years old and still in excellent condition. I tried a cheaper quality ground cloth, which in my case had orange lines instead of green, and that didn’t work well. It was too cheap and fell apart after a year or two. It fell apart in a very unfriendly way, leaving little strands of plastic all over my garden. If you use ground cloth, make sure to get the higher quality material.
I cover different parts of my garden for different times, but generally in a worst case scenario it takes about 6 months to kill all weeds with this plastic. If the weeds are light, it can take as little as a month. It also depends on the time of year, for example in winter many weeds are dormant and take longer to be killed. The weed killing properties are most effective in spring, just as perennial weeds are breaking their dormancy.
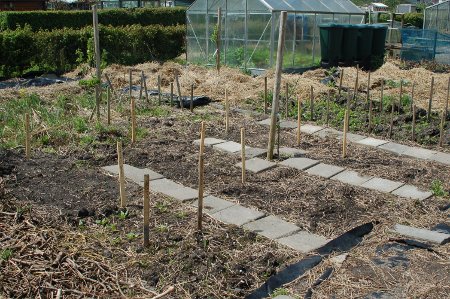
This is another part of my garden, but you can see what happens after I pull up the plastic. Since I use straw as mulch, normally when I pull up the plastic there is a bit left over that can just be raked away. There are also always a few weeds growing around the edges that need to be dug up, and the ground is generally a little compacted and needs to be loosened with a digging fork. After that I make paths from the paving stones like you see in the picture.
In some parts of the garden, the paths stay the same from one year to the next, but in others the pattern of paths changes. This isn’t really important.
The areas between the stones I treat like a raised bed. In other words, I don’t dig them up unless it’s necessary, I don’t walk in them and from time to time I throw some compost on the top of them. This is a so-called borderless raised bed, and works nearly as well as a traditional framed raised bed, except more effort is needed to bend down and pull weeds. A true raised bed is nicer, but this is a very good alternative.
The sticks you see are my plant markers. They are just cut up pieces of cheap grade lumber, which I can in fact buy here cheaper than any other sort of plant marker. I use a permanent black marker to write on them, and I angle them away from the sun to reduce the problem of fading. At the end of the year, I sand off the old plant name and reuse them.
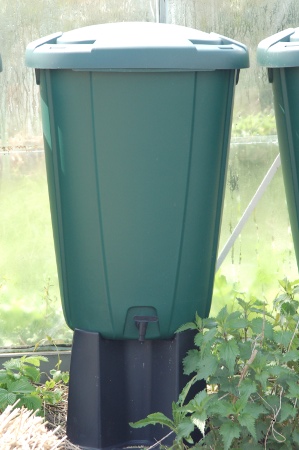
I was recently talking about my water containers, and I thought I would post a picture of what I’m currently using. This is a standard store bought water butt. It sits on a stand and has a water tap, so you can fill a watering can or other container from the bottom. It can just as easily sit on the ground and be used for dunking a water container in from the top.
It has a lid that’s designed to collect small amounts of water, and will for example over the course of the winter fill up on it’s own. There are also various kits you can buy to connect them in tandem at the top, so when one fills up it overflows into the next. There are also kits available to connect them to a gutter on a house, shed or greenhouse. It’s also simple enough to rig something up yourself, and it’s not necessary to buy the extra kits. In fact there’s no reason to purchase a water butts like this, as it’s something you can make yourself too.
In my case, at the moment, I do everything manually. I have a single container that collects water from my greenhouse roof, and I move the water by hand from there to a number of these other water butts.
Mulching, Sheet Mulching, Lasagna Gardening and Raised Beds
Okay, it’s the time of year where a lot of people are trying to figure these things out, so I thought I would make a post. I’m pretty sure I’ve covered all these things before, but it’s the nature of blogs that things scroll off the front page and get lost, so it’s probably a good idea to say it all again.
Mulching
Christopher and Rosemary made a post recently about this, with lots of great information. I’m just going to add a few things to what they already said.
In terms of controlling weeds, there are two main mulching techniques, sheet mulching and using material high in carbon. In case of the former the idea is to smother the weeds, and the latter is to create a chemical reaction between carbon (C) and nitrogen (N).
C and N are everywhere in the garden, and all composting and rotting is a reaction between these two elements. Dry brown plant materials are high in C, and green plant materials and manures are high in N. In addition there’s N present everywhere in the air, and it’s an essential nutrient in the ground. All plant and animal life depends on N.
When you put high C mulch on the ground and it starts to rot, it needs N from somewhere, and it tends to take it out of the top 2 or so centimeters (roughly 1″) of the ground. Because it makes the surface layer of the garden soil N poor, it makes it hard for plants to grow in it. Any plants with roots deeper than this can get N elsewhere in the ground, which is why you can place mulch around established plants.
After mulch rots, it releases the N into the ground again, so there is no net loss of N in your garden. You do not need to add extra N to make up for any loss of N, because none is lost.
If you want to use mulch to kill established plants with roots deeper than a few centimeters, normally you use some sort of sheet mulch. In my garden I use plastic, what in Europe is usually called ground cloth and in the US I think is usually called landscape fabric. Probably most people reading this know what I’m talking about. It’s a reusable woven plastic material, often with green or orange lines, that lets water and air pass through it but blocks light. In this way it destroys weeds, but not other life in the ground.
Many people use biodegradable sheet mulches like cardboard or newspaper, which can be left in place to rot as well as covered with dirt and planted into right away. Lasagna gardening can make use of this principle. I use too much sheet mulch to use something that’s not reusable, otherwise I would have to bring too many mulching materials into my garden.
As an alternative to using sheet mulching to kill established weeds, you can also use a very reactive high C material. Wood chips are an example of this. Fresh wood chips are very aggressive in removing N from whatever they come in contact with, and will generally kill established weeds. For this reason, they are normally used on paths around the garden rather than in the garden itself. It’s also important not to turn wood chips under, because they will make the ground very N-poor and difficult to grow anything.
The other thing that happens when you use mulch, which is unrelated to everything else I’ve said here, is even when weeds to manage to grow through the mulch their roots tend to come up near the surface. This generally means they can be removed with a rake or are very easy to pull out by hand.
Lasagna Gardening and Raised Beds
For no-dig/permaculture style gardening, it’s important to control the weeds with mulching techniques. There’s no such thing as a garden free of weeds! You will always have to do some weeding by hand, but you want to make your job as easy as possible.
It’s also important to keep the ground as loose as possible, so when there are weeds, they are as easy as possible to remove. This is normally best achieved by maintaining distinct layers in your garden soil, which help promote good drainage and a good home for beneficial organisms. These layers are where the idea of lasagna gardening come from.
You need not do very much special to get these layers, by simply not disturbing the soil and adding home made compost from time to time on the top of your garden beds, they will develop layers on their own.
It’s also important not to walk in your beds, in order to minimize compacting of the soil.
It’s very possible to combine the idea of sheet mulching and lasagna gardening, and Ewa recently made a post about this including a how-to video. For my purposes however, this is kind of a lot of work and it’s not always necessary. Constructing a bed like this is only necessary if you have a spot where you want to build a garden bed, that has established weeds, and you want to plant in it right away.
Raised beds, while convenient because of their height, meaning you don’t have to bend down so far, are also not always necessary. It’s also possible to make use of what Kenny calls borderless raised beds. These aren’t really raised beds at all, but rather a place in your garden you simply designate and treat as a raised bed but isn’t raised. These generally work as well or nearly as well as a true raised bed, and what I mostly use.
Unless you have recycled materials available, constructing the type of bed in Ewa’s post or a true raised bed can involve a lot of unnecessary, expensive and sometimes environmentally unfriendly materials like peat products or timber. For example raised beds are generally built with wood that if treated will leach chemicals into your garden, and otherwise will only last a few years before needing to be replaced. They can also be built with bricks or stones, but this is more work and the materials have to be brought from somewhere. In any case, raised beds are generally only worth building if you know you will use the same garden for a number of years.
My Methodology
Sheet mulching takes about 6 months to kill the plants under it, and since my garden is in continuous use, I can usually plan in advance when needing to kill an area of established weeds. I use the woven plastic material I mentioned above, and on an ongoing basis mulch parts of my garden. Any time a part of my garden becomes unused for a time, like at the beginning of winter, I make an effort to keep it covered with plastic if possible. It’s of course always better to keep something growing in the ground, like a cover crop, but this isn’t always possible.
I built a number of raised beds I posted about here. Otherwise, I make ‘borderless’ raised beds by building temporary paths with small paving stones, about 30cm or a foot square. In the picture on the top of the same post above, you can see I then use a lot of straw to control annual weeds.
Before I plant in each bed I rake any straw that may remain from the previous year to the side, loosen the ground a little bit with a digging fork, then plant directly into it. Some of the beds also get some added compost.
The whole process in the spring of first removing the plastic mulch from the ground, building paths with paving stones, loosening the ground with a digging fork and raking the ground clear all takes a very short time and is very little work compared with digging weeds out every year like the other gardeners in my community garden do. I’ll try to post some pictures of this sometime, so you can see better what I’m talking about.
New Apple Trees
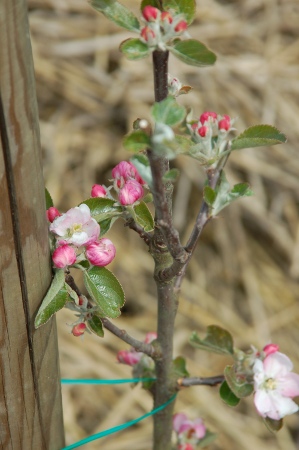
Until now, all the apple trees in my garden have had white blossoms. I’ve been pleasantly surprised to find some of the blossoms on my new apple trees are really very colorful. The one above is Rosemary Russet apple.
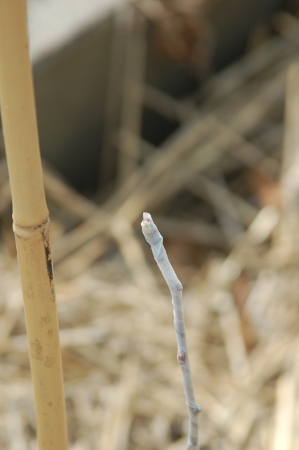
I’ve been trying some more grafts. The one above is scion wood Søren sent me of a Danish heritage variety called Filippa. I’ve grafted it to MM106 rootstock, which is the locally recommended for standard growing conditions.
Anyway, in this case I wrapped the entire scion in Parafilm tape. You can see it’s starting to bud under the tape in the middle of the picture and at the top.
Søren says he thinks he sent the scion too late, as it was already starting to break it’s winter dormancy. It’s apparently nothing to see it budding, what’s really important is if the graft heals, and this may not happen if it buds too quickly and puts all of it’s resources into new spring growth.
We shall see…
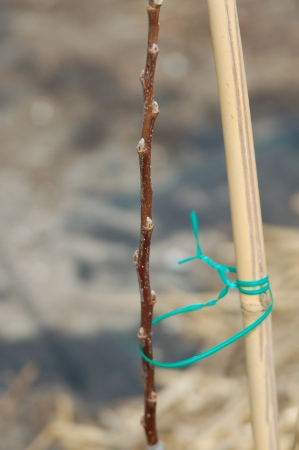
This is another scion I grafted at the same time. In this case one of my existing trees of an unnamed variety onto MM106 rootstock. If you look at this picture very closely, you can see some red spots where it’s starting to bud. It obviously worked better to wrap the whole scion in parafilm, but this seems to work too. It won’t be a big loss if this graft doesn’t take, I will just try again next year.


