More Dry Beans

I promised some more pictures of dried beans. Here is the last round harvested from my garden.

Dry Beans

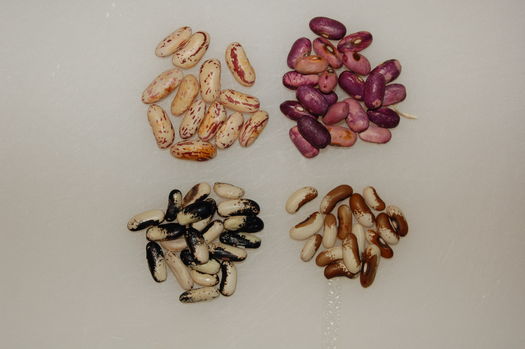
From left to right, up to down, these are Boston Favorite, Purple Prince, Penguin and Painted Pony beans.

Dry Beans

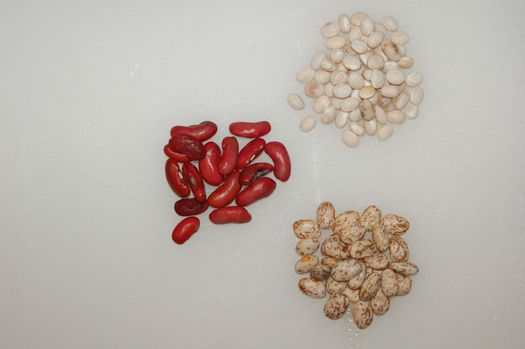
Here are some more ordinary beans. Dark Red Kidney, Navy and Pinto beans. This variety of Pinto is similar, but different from what you normally see in stores.

Dry Beans

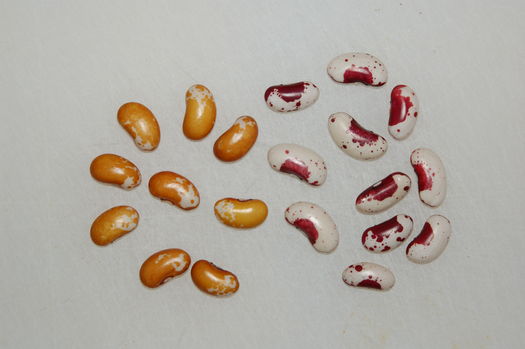
Appalossa and Dog Beans

On the left are Appalossa beans. and on the right Dog beans. Dog beans by the way are a variety of Jacob’s Cattle bean, and look nearly identical. I am growing some more varieties, and will post more pictures later after I harvest them.

I think many gardeners forget about beans, especially dry beans. I have to travel to my garden, and because I am not there regularly enough, green beans are not really an option for me.

I am really a fan of bush dry beans. They don’t require poles or other support. You usually have to do one or two rounds of weeding after planting the seeds, but after that the foliage usually covers the ground and smothers the weeds. As far as things you can grow in your garden, they are fairly prolific. A 15ft (4.5m) row will normally yield at least a pound (500g) of dry beans, and sometimes 2-3 times that. Beans don’t need rich soil, and will fix nitrogen and improve any soil they are grown in. They are normally ready for harvest in 90 days, making them suitable for almost any climate and even fairly short growing seasons. This is of course all assuming you have the proper nitrogen fixing bacteria in the ground.

The variety of beans available is astonishing, I guess hundreds or maybe even thousands. If you grow several kinds they will sit in jars on your shelf and you will get to know them like bottles of fine wine. Each with it’s own special taste.

In terms of preserving your harvest, nothing could be easier. Just let them air dry throughly, before putting them in an airtight container. It is a very good idea to ‘Pasturize’ your harvest by putting it in the deep freeze for a few days. As long as the beans are dry this won’t hurt them, and it will kill the eggs of any insect pests that might remain after harvest. If you are afraid they might not be dry enough, freeze a few of them first, and see if it goes okay. If you are saving them for seed, you may wish to germination test the seeds from your freeze test.

There is a world of difference in taste between what you grow at home and what you buy in the store. Store bought beans are frequently years old, and always totally and throughly dried out. So dry, you need to soak them overnight before using them, then usually you have to cook them for more than an hour to make them eatable. They are also unlikely to grow if you try planting them.

What you grow yourself usually doesn’t need any more than a few hours soaking, and less than a half hour cooking. The taste is fresh like you have never had before. The seeds are the same as what you eat, just set some aside and plant them.
Carrot Pictures

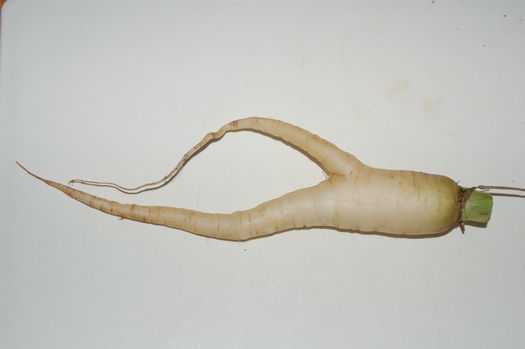
First of course a bifurcation:

Bifurcated Carrot

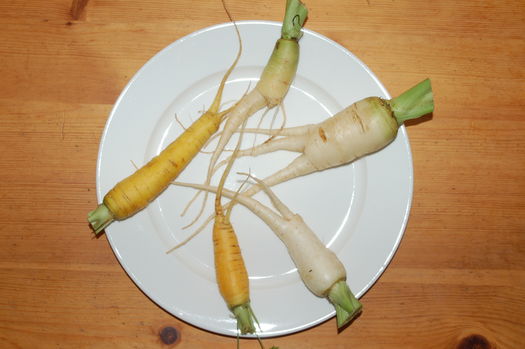
More bifurcations:

More Bifurcated Carrots

I don’t know why, but it wasn’t a good year for bifurcations. I had a lot more last year, but didn’t have a chance to take any pictures.

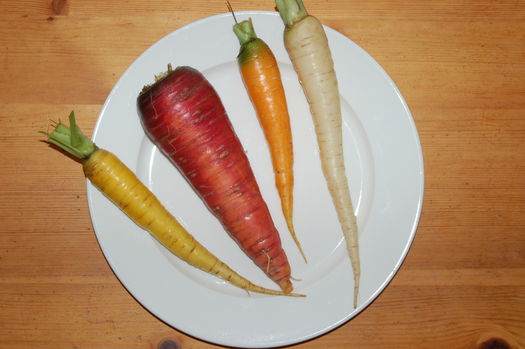
Here are amarillo yellow, cosmic purple and lunar white carrots. I don’t know what the orange carrot is because I didn’t plant any this year. It’s probably just a sport (chance genetic variation) or a stray seed from a different kind that got mixed in with the rest.

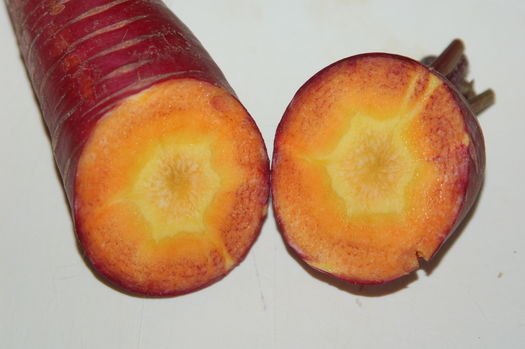
Here is the inside of the Cosmic Purple carrot. If you look closely you can see different shades of orange, yellow and green.

Inside Cosmic Purple Carrot

Garlic Colors

My garlic bulbs just finished drying and curing the other day, and I have been cleaning them up. I grew 20+ varieties of garlic this year. Most of these I have never grown before, and I have certainly never grown so many at one time. I was really surprised at how pretty some of them came out after I rubbed all the dirt off.

Garlic

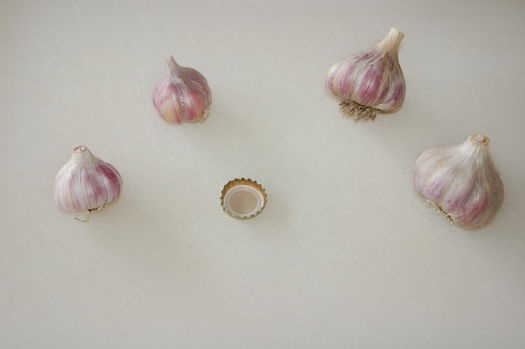
From left to right, these are Chesnok Red, Vekak Czech, Guatemalan Ikeda and Garlic Seed Foundation #65 garlics. The bottle cap is for size reference.

Garlic

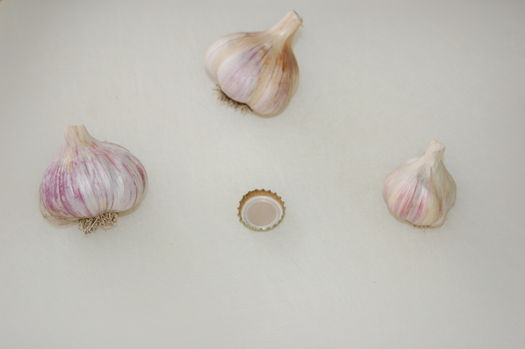
Here are Persian Star, Susan Delafield and Russian Softneck (which was kind of a strange name for what looked like hard neck garlic to me).

Garlic

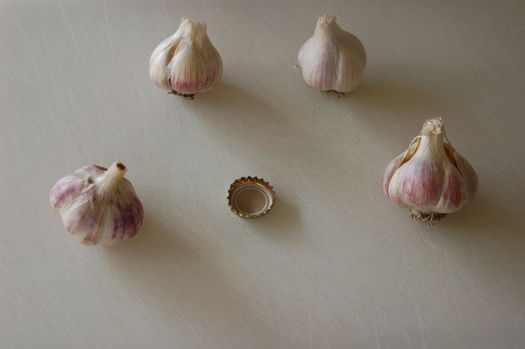
Finally Sweet Haven, Rosewood, Georgian Crystal and Gypsy Red.

I haven’t tasted any of these yet. It’s plants like these that strike me as such a shame, because only the gardener can really appreciate the beauty in something like this. Once it’s cooked into food you don’t see it anymore, and it’s not something that anyone would really buy in a store even if you could find it for sale somewhere. It’s a bit like swiss chard, that can look so pretty in the garden, but by the time you remove the stems and cook it, it just looks like cooked green leaves in the end.

Diversity in Beets

White, Red and Golden Beets

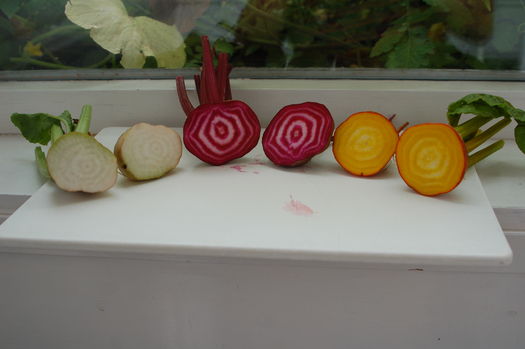
From left to right these are Albino, Early Wonder and Golden beets. This picture is taken when raw, and they will lose some of the color when cooked. In particular the distinction of the rings will fade. They all have slightly different tastes, but all distinctly beet like.

Another beet not shown here, but worth mentioning is the Chioggia beet. It has very distinctive peppermint like rings of red and white, and looks great when served raw as a garnish. I didn’t grow it this year, because I am not very fond of the taste.