Golden Sweet Snow Peas

Snow Peas

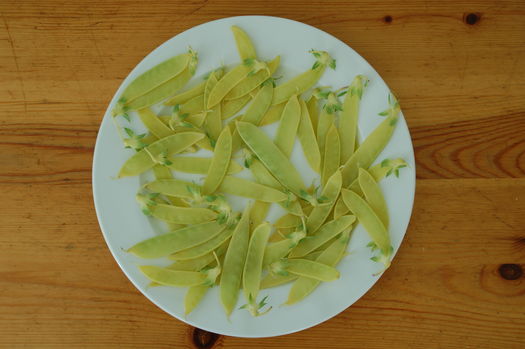
These are a nice alternative to green snow peas. They have a nice yellow/green color, and look particularly nice when served mixed with green snow peas.

The plants are good producers, and grow to about 2 meters. I got good results by planting a double row, with a trellis in the middle and about 3cm spacing for the seeds.

Garlic Scapes

Garlic Scapes

If you grow hard neck garlic you also get a bonus harvest of scapes.

Since garlic reproduces asexually, it has no flower and no true seed pod. It does however have something similar to a seed pod called a scape. The scape does not contain true seeds, but rather bulbils. These can be planted and will produce more garlic plants, but they will be small. It takes several generations of replanting to get plants of the same size as the original, and for this reason most garlic growers prefer to grow garlic from the cloves rather than the bulbils.

If left to mature on the plant, the scapes will consume a lot of the plant’s resources, and result in smaller garlic bulbs, so for this reason are best harvested from the plant shortly after they appear.

Garlic scapes are delicious. They do have a distinctive garlicky taste, but they are not very strong. They have a texture like, and are cooked similar to, green beans. You can eat the whole stalk together with the scape, so be sure to harvest it as close to the plant as possible so you don’t miss any. They can be fried or steamed, and eaten by themselves. When cooked in something like a stirfry, they give the whole dish a wonderful garlicky taste. They are best not eaten raw, because the flavor is too strong.

New Look

If you read our blog with a browser, you will notice a new look. We’ve updated our theme and hope this one is easier to read.

RSS users won’t notice any change.

Dehydrator

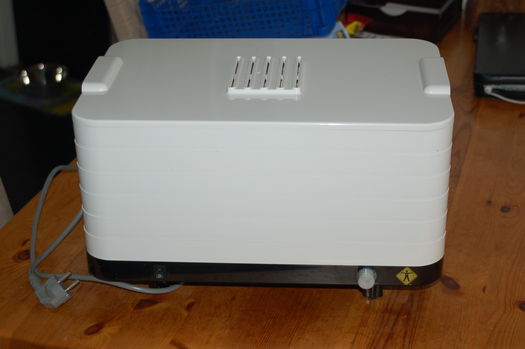
Food Dehydrator

Once you’ve grown food in your garden, one of the biggest challenges is finding a good way to preserve it. My two favorite ways are freezing and dehydrating. Since it’s spring, and I don’t have a lot growing in my garden to harvest at the moment, I decided to dehydrate a batch of ordinary mushrooms from the supermarket.

Here are the mushrooms before:
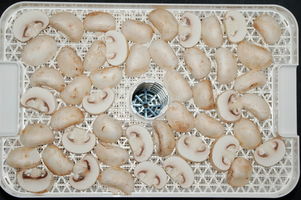
Mushrooms Before Dehydrating

And the same mushrooms after:

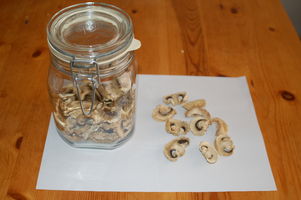
Mushrooms After Dehydrating

I used about 2.5Kg of medium sized (about 5cm in diameter) mushrooms, which yielded about 1 liter of dried mushrooms. I sliced each mushroom into 3 or 4 pieces.

For mushrooms there are two things in particular to watch out for, making sure they don’t rot while you are drying them and making sure they are completely dried out. Since mushrooms will rot in warm humid conditions, you need to keep the temperature of the dehydrator low at the beginning until the mushrooms dry out a bit, then you can turn it up. You should also use a brush to clean them rather than running water, so you have as little dampness in the dehydrator to begin with. Finally, you need to leave them in the dehydrator until they are crispy and brittle. Just drying them until they are leathery is not good enough. It’s a good idea to check them 24 hours after drying them, to make sure they are really dry all the way through.

When dehydrating any food, keep in mind that it will shrink a lot. Even after rehydrating it will not return to it’s full original size. Always be careful not to cut it into pieces that are too small.

While mushrooms don’t need any pre-treatment before drying, most foods do. Most vegetables need to be blanched in boiling water or steam. Most fruits need to be treated with ascorbic acid (vitamin C). Some foods need to be treated with sulphur. For those of you reading this who already freeze their own foods, the blanching required for freezing vegetables is usually the same as what’s required for dehydrating them. Pre-treatment instructions will almost certainly come with your dehydrator, and can also be found by searching the Internet.

Blanching takes a little personal judgement. Blanching instructions usually say to time it starting when the water returns to a full boil. Often they say to be sure to add the food to the boiling water slowly enough so that it keeps boiling. If for example you have a 2.5Kg sack of potatoes, you will have to add it very slowly to even the largest pot of water for the water to keep boiling. If you add them that slowly, the potatoes you put in first will be sufficiently blanched long before you have added the last of them. You just have to experiment in such situations. In general it’s better to add everything to the water in one go, and start timing when the water starts boiling again, even if it takes a while for this to happen.

Only dehydrate top quality foods. Whatever you put in the dehydrator should be blemish free, fresh and free of dirt.

As a rule, the way to rehydrate any vegetable is to soak in hot water for 30 minutes, then use as you would fresh vegetables. Some things don’t always need so long, and often dehydrated vegetables can be added directly when cooking things like soup. One of my favorite ways to use dehydrated vegetables is added directly to ramen (instant noodles).

Besides mushrooms, some things I dehydrated recently are:

Carrots: 4-5mm slices work best. No pre-treatment is necessary. Grating them also works, but remember they will shrink a lot, so try to grate them as coarsely as possible.

Celeriac: 4-5mm slices work best. Blanch for about 3 minutes in boiling water or steam. Allow ample time for rehydration.

Potatoes: 4-5 mm slices. Blanch for 5 minutes in boiling water. Allow ample time for rehydration.

Onions: 4-5mm slices. No pretreatment necessary.

Green Beans: Cleaned and cut like normal. Blanch 3 minutes. You may have to experiment to get the blanching time right, it’s easy to over cook them.

Apples: Core and slice. Soak in a mixture of 1/4 tsp ascorbic acid and 250ml water (1 cup) for a few minutes before dehydrating. Limited shelf life.
Coffee

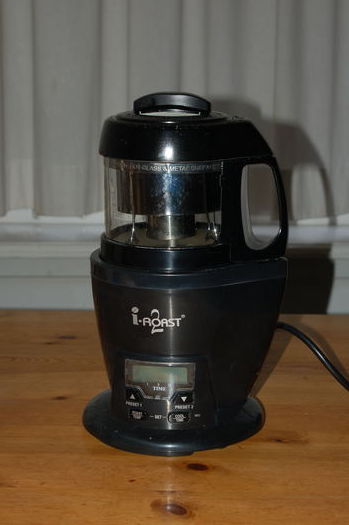
Coffee Roaster

Why roast your own coffee, and what does this have to do with heirloom gardening? Good question!

More than 95% of coffee in the world is consumed stale. Coffee stays fresh about 2 weeks after roasting and 3 days after grinding. Green coffee beans on the other hand will retain their quality for a few years at least. Since many of us don’t have easy access to good quality fresh roasted coffee, roasting your own is a good alternative. Roasting a batch of coffee takes about 15 minutes, and is easy to do once you get the hang of it.

There was a time when all coffee was grown in the shade of trees. Because of the climate required for coffee, this usually meant it was grown in rainforests. This turned out to be a win-win situation for both farmers and the rainforests, because growing coffee did little damage to the environment and was economically sustainable. Since coffee is the most valuable commodity in the world after oil, it was easy for the farmer to make a fair profit. Farmers could also operate independently, because the original coffee plants were old varieties, free from intellectual property rights and needed little in the way of chemical sprays or fertilizers. Growing coffee resulted in near 100% profit for the farmers, and in a bad year the worst that happened was they didn’t make any money.

Then everything changed. Along came a new variety of coffee, an F1 hybrid, that could tolerate direct sunlight. In addition the yields of this type of coffee were much higher than the older varieties. Since this new type of coffee was a patented hybrid, it meant the farmers had to purchase the seeds instead of saving their own. In addition the plants required full sun, so couldn’t be grown in the shade of trees anymore, and it required the use of chemical sprays and fertilizers which were also patented.

For the coffee farmers, it was an opportunity to make more money, or so it seemed. By growing this new type of coffee, with possibly double or triple yields when compared with their older varieties of coffee, their higher profits more than made up for the additional costs. For many farmers the need for direct sunlight was also an easy problem to solve, by simply cutting their rainforests down.

Suddenly the world’s coffee markets became flooded with this new kind of coffee. Prices fell, and the increased yields were no longer enough to make up for the extra costs of the new coffee. Suddenly farmers found themselves not only unable to make a living wage growing coffee, but having to pay royalties on their seeds, pesticides and fertilizers just to keep their farms alive. The only farmers who could survive were the ones who could expand fast enough to grow even more, and flood the already saturated world markets with still more coffee. Suddenly there was no going back to the old ways of growing coffee.

Yes, it’s true. You can make a difference by buying Fair Trade coffee, but that only addresses part of the problem. By roasting your own coffee it is a little easier to buy shade grown coffee as direct as possible from coffee plantations or cooperatives. If you are on holiday in a coffee growing region of the world, you can buy the coffee at it’s source knowing it will last several years after you bring it home. Being able to roast your own coffee offers more possibilities to buy coffee over the Internet, from the right kinds of places.

If you have easy access to fresh roasted socially responsible coffee, having a coffee roaster may not change much. If not, and you drink a lot of coffee, it might be worth considering. If for no other reason, drinking fresh coffee instead of stale coffee makes a big difference!